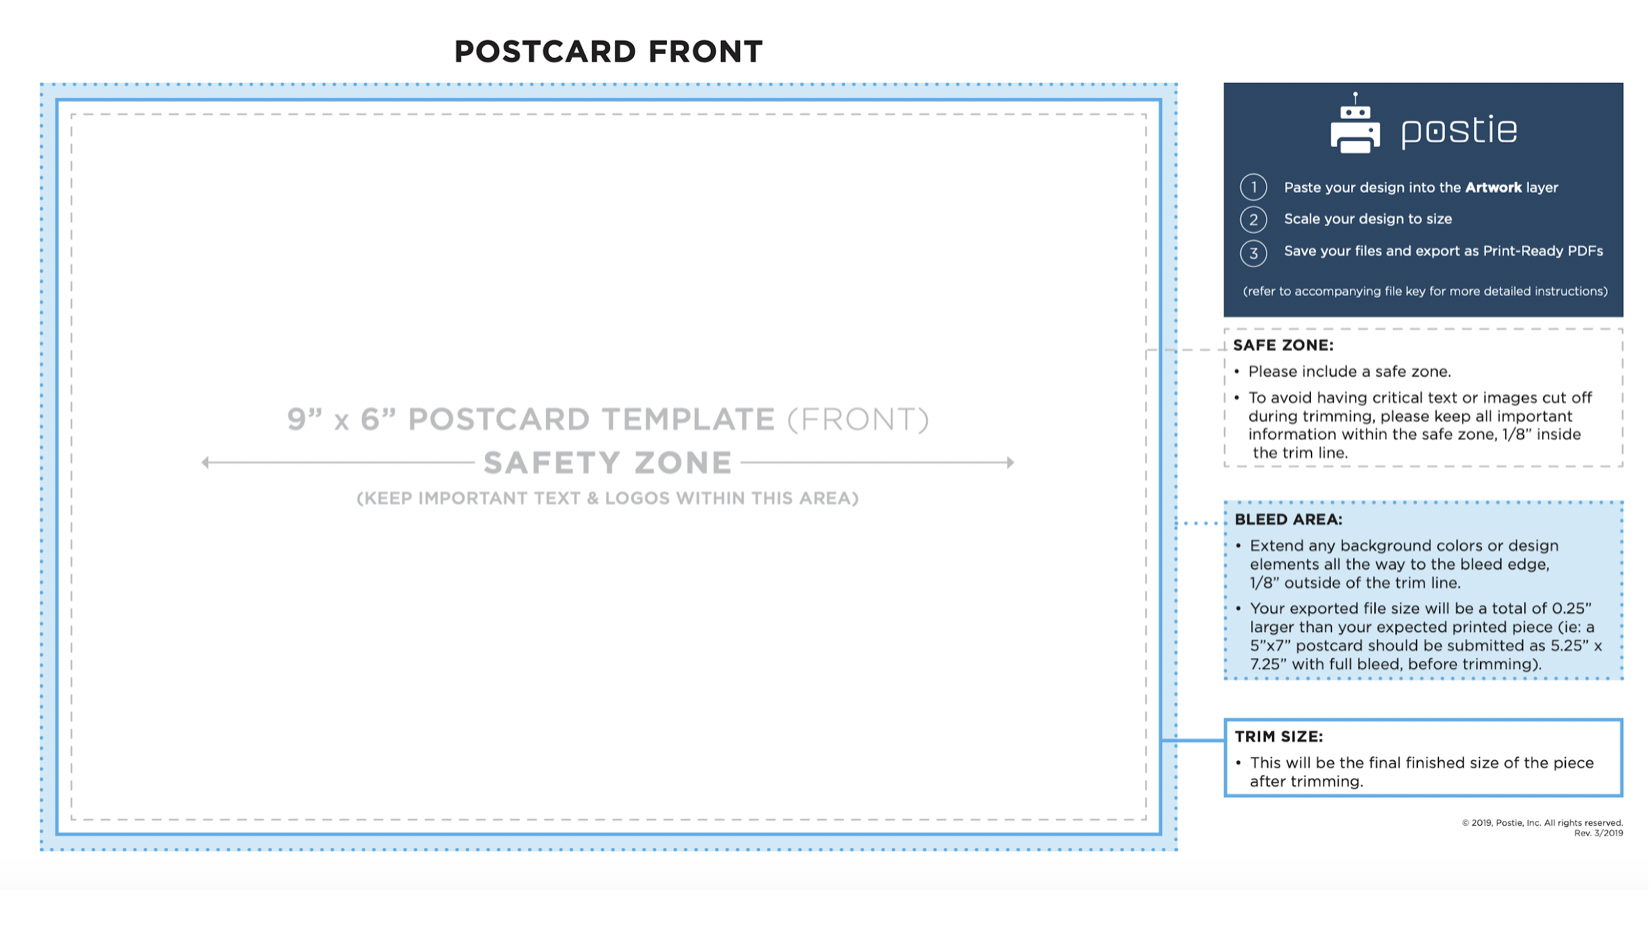
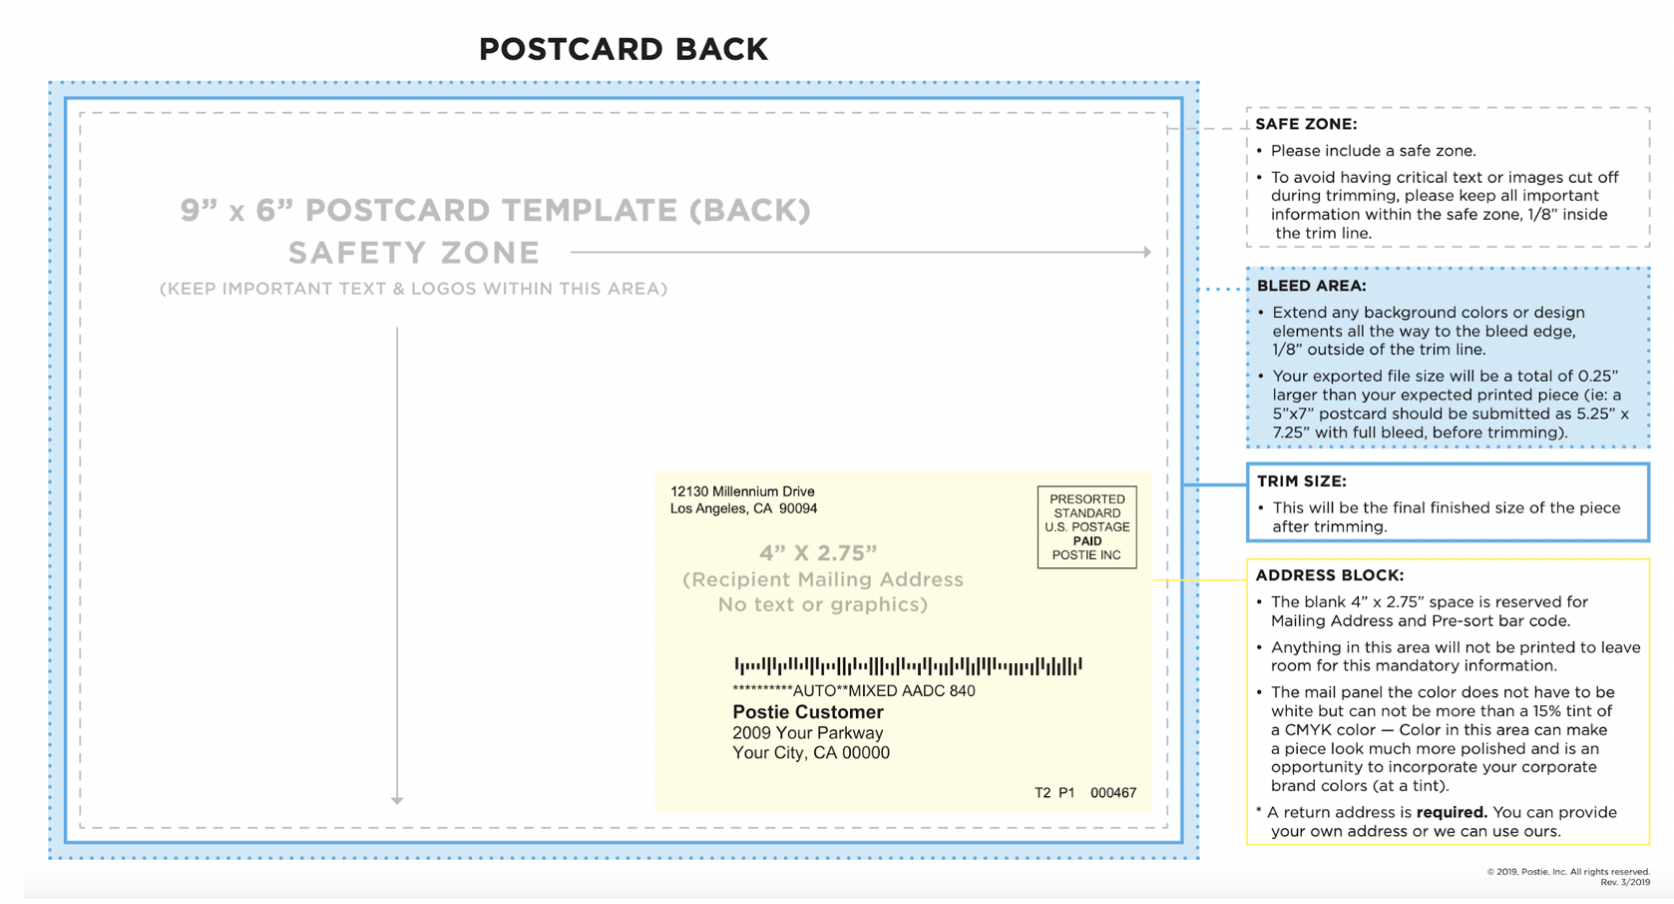
Bleeds are part of printing that go beyond the edge of where your piece will be trimmed. In other words, the bleed is the area that will be trimmed off. The bleed area gives our printers a small amount of space to account for movement of the paper, and design inconsistencies. Artwork and background colors need to extend into the bleed area. After trimming, the bleed ensures that no unprinted edges occur in the final trimmed document.
It is very difficult to print exactly to the edge of a sheet of paper/card. In order to achieve this, it is necessary to print a slightly larger area than is needed and then trim the paper/card. Images, background images and fills which are intended to extend to the edge of the page must be extended beyond the trim line to give a bleed.
*We request 1/8” bleed to be added to a file on all sides, which means your file will be 1/4” bigging in both the vertical and horizontal directions. If your final piece is a 4.25” x 6" postcard the art you need to supply to us will be 4.5x6.25.
Things to avoid when creating bleed:
- Enlarging just the image will result in material you expected to be on the printed piece getting cut off. The concept is to extend the art so that non critical material is in the bleed area.
- Adding white borders around the creative will not suffice. You want the creative to stretch to the edge, adding white borders will only leave inconsistent white areas around the creative.
Bleed Steps and Best Practices